Automatic Label Printer with Raspberry Pi
Thanks to post about building a Pi powered wireless label printer published on Design Spark I have found out about software package made by Philipp Klaus which makes it possible to control label printers made by Brother company from Raspberry Pi. This inspired me to make automatic label printer which would periodicaly check for new orders on e-shop and automaticaly print labels for shipping sold items. I have made it for particular Czech online secondhand bookshop called trhknih.cz. This e-shop has API which can be used for gathering needed data. I used Python programming language. I hope this post might serve as inspiration for automating different label printing tasks.
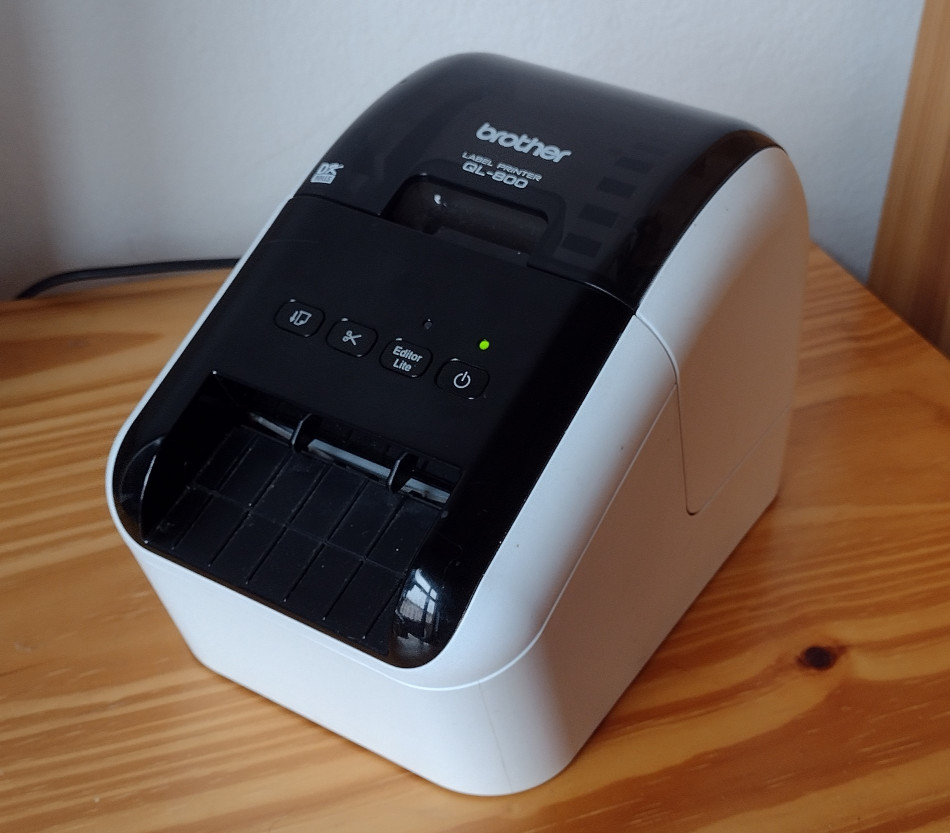
Brother QL-800
Brother company manufatures different printers and scanners. The printer I was using is QL-800. It is compact and cheap label printer designed for printing less then 100 labels per day. It can print in black and red color using direct termal printing technology. Labels are printed on continuous roll paper with up to 62 mm width and the printer contains integrated cutter so custom label lengths are possible. Labels are self-adhesive.

Hardware assembly
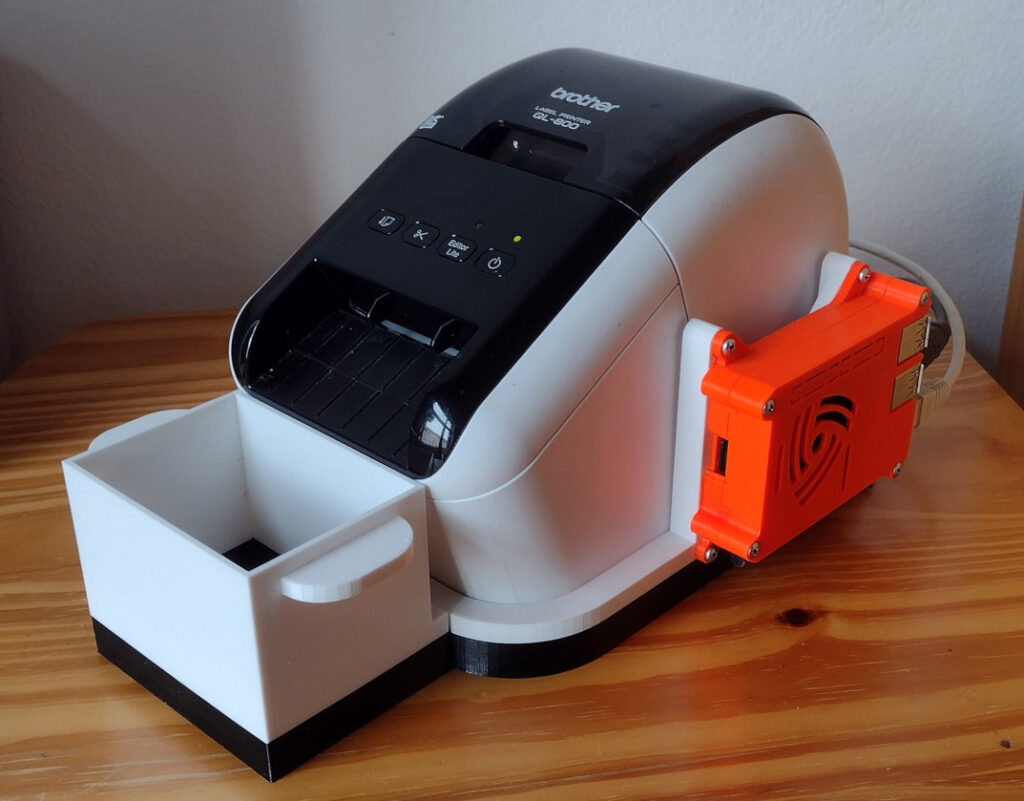
My idea was to connect together Raspberry Pi 3 model B+ and Brother printer. Raspberry would be connected to internet periodicaly checking for new orders on e-shop API. If there are new orders, it would print needed labels for sending sold items using post service. I wanted to mount Raspberry Pi and printer itself together using 3D printed parts turning it into compact automatic label printer. Also I wanted to add some removable container where would printed labels fall into.
There are basicaly two distinct parts which needs to be 3D printed:
- Raspberry Pi case
- QL-800 base with Raspberry Pi case mount and label collector
I have chosen Raspberry Pi case created by Thingiverse user called 0110-m-p. Stl and other files and information can be accessed on this link: https://www.thingiverse.com/thing:922740
I designed QL-800 base with Raspberry Pi case mount myself using OpenSCAD software. It has removable label collector which connects to main body using four neodymium magnets. You can read more details about it and download source files and stl files here.

Raspberry Pi and Brother printer are connected together by short USB cable. Pi is connected using ethernet cable into my home router.
Brother QL Python packages overview
There are two interesting Python packages for Brother QL printers both created by Philipp Klaus: brother_ql and brother_ql_web. Philipp Klaus writes about brother_ql package:
This software bypasses the whole printing system including printer drivers and directly talks to your label printer instead. This means that even though Brother doesn’t offer a driver for the Raspberry Pi (running Linux on ARM) you can print nicely using this software.
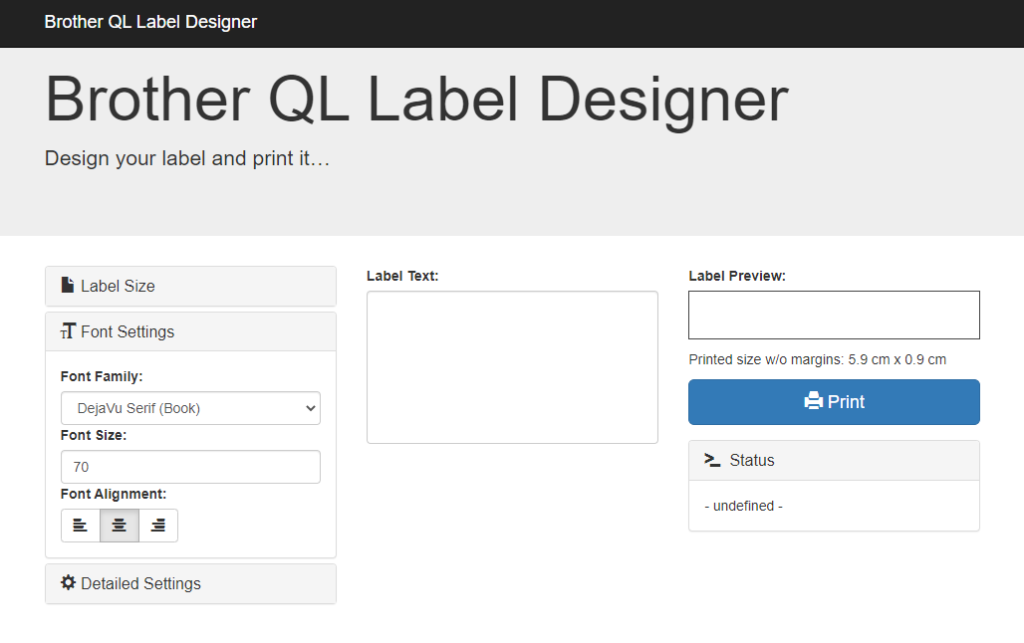
Brother_ql_web is built upon brother_ql and it allows running web application for creating and prining labels on our Raspberry Pi. Its GUI looks like this:

This web interface is responsive. Another cool feature of brother_ql_web package is that it contains also API which can be used to print labels based on text, font size, font type etc. This is perfect for creating automatic label printer.
Turning Pi into print server
I was using Raspberry Pi 3 model B+ with Raspberry Pi OS Lite. First steps I did was enabling SSH and setting Pi so it uses static IP address. I have described how to do it in my post about SDI-12 analyzer. I can then access the Raspberry Pi using SSH easily and it will be also convenient for accessing print server.
Once that was done I could log into my Pi using SSH and install brother_ql package:
Then I installed web service for printing labels. To do that run following commands in your home directory:
Then it is needed to edit config.json file. We have to set printer model and default label width (62 mm in case of QL-800). My config.json looks like this:
Web service for printing labels will run on port 8080. If you don’t want to bother with port numbers, you can change the port to 80 which is default http port. Notice that it is also possible to change titles of print server web interface to some custom text.
Once we are done with editing config.json we can run the web service in the background:
Now we should be able to access web server on local network. I have set my Pi to have static IP address 192.168.0.20 and left port as it was by default (8080) so I am able to access print server GUI on address: http://192.168.0.20:8080/labeldesigner using web browser.
Because we set static IP address we can save it into our browser’s boomarks so we can easily access it from local network to print custom labels.
Keeping printer turned on
Brother QL-800 has “auto power off” feature which causes that printer turns itself off after one hour of inactivity. It has to be turned back on my manualy pressing button on the printer. It is possible to disable “auto power-off” function from Pi by following command:
This setting will remain saved in printer’s memory even after power cycling the printer so it is sufficient to send it just once.
We can also enable “auto power-on” feature. This causes that printer will be turned on after plugging it into mains without need to turn it on by pressing button. This will ensure that that printer will automaticaly recover in case of blackout. To enable “auto power-on” use this command:
Now that the Brother QL-800 printer recovers automaticaly after blackout it makes sense to also start print service automaticaly after booting. To do that, edit /etc/rc.local and before the exit 0 line add:
Now our print server should recover fully after blackout.
Creating automatic label printer using Python and cron
Next step was writing Python script which would turn my Pi and printer combo into automatic label printer. I have written Python script which uses trhknih.cz API. Trhknih.cz is Czech e-shop with second hand books. It allows people sell books they no longer need to someone else. There are two options for handover: sending items using post (or similar) service and local handover when both seller and buyer would meet in person to do the transaction.
Complete Python code can be downloaded from my GitHub repository automatic_label_printer.
The Python script checks for orders which were not processed yet. If such order is found it checks for order status first (ordered, payed, sent, canceled etc.). If the order has been already payed but not processed further, it checks for type of handover. In case that post service will be used, it gets shipping details, creates label text from it and prints labels with both recipient and sender addresses. To print these labels I am using brother_ql_web web service API as you can see in following code:
I am using “localhost” string as IP address. This basicaly means “my own IP address” and its meaning is the same as if we used 127.0.0.1 address. This works because both my Python script and my web service run on the same machine. It will also ensure we will not have to change the code in case we would like to run the script on Pi with different IP address or with dynamic IP address.
As you can see the function takes label text and font size as input parameters. Font size is important as more characters in one row basicaly means that we have to use smaller font (and vice versa) so the text is spread nicely over whole 62 mm label width. After some tinkering I came out with simple linear equation for determining font size which works well (so far 🙂 ).
In case of local handover, the script gets information about item details and sends automaticaly e-mail to customer containing item details and information about prefered location and time for handover, futher contact details etc.
After order is successfully processed its ID is written into local file to mark it so it is not processed multiple times.
Last step is to ensure the Python script is run periodicaly. On Raspberry Pi OS this can be done using cron. I decided to run the script once per day at 11 AM. To do that open cron table by “crontab -e” command and add following line:
Conclusion
Brother_ql_web package allows us to turn Raspberry Pi and Brother QL printer combo into print server with lovely GUI for printing custom labels. At the same time it is possible to also use brother_ql_web API to automate recurring label printing tasks. I hope this post will serve as inspiration for you and help you turn annoying recurring tasks into programming fun 🙂 Good luck!
If you want to be notified about new posts and updates consider subscribing to my mailing list.
2 thoughts on “Automatic Label Printer with Raspberry Pi”
Thanks for this post Pavel! I’m working on a similar system for the hackerspace I belong to, hacklab.to.
I came across brother_ql and brother_ql_web before this post, but you’ve added a great deal more the quality of life of my project. Thank you for the “disable auto-poweroff” and “auto-power-on” commands you posted!
I look forward to your next post. Thanks again!
– Chalmers
Thank You for comment. I am glad it was helpful. I have tons of articles in progress and tons of ideas in my head, but unfortunately no time to work on it these days. I wish You luck with Your project!